Access and portals
The computer center uses the SpamAssassin software system for the detection of unwanted e-mails.
SpamAssassin is a system for automatic detection of unwanted e-mails (also known as SPAM). It uses various methods to determine a value for the probability that a receiving email is SPAM. This rating is entered in the mail header of the e-mail.
By setting filter rules in the mail client, spam emails can be sorted out. The following table shows examples based on empirical values from the data center.
| Number of stars | Result |
| no "X-Spam-Level" Mail header entry | almost certainly not SPAM |
| 1-4 | possibly SPAM (check manually!) |
| 5-10 | almost certainly SPAM |
| 10- 999 | very safe SPAM |
The detected SPAM - probability is represented by the number of stars in the line "X-Spam-Level:".
The mail header for a spam message then looks something like this:
X-Spam-Status: Yes, hits=12.0 tagged_above=0 required=5 tests=BAYES_90,
X-Spam-Level: ************
X-Spam-Flag: YES
However, the message is always delivered regardless of the calculated rating and can be sorted out by the mail client based on the rating.
For other e-mail clients, both the procedure and the settings can be roughly copied from these descriptions.
Create a SPAM folder
Step 1: Create a SPAM folder
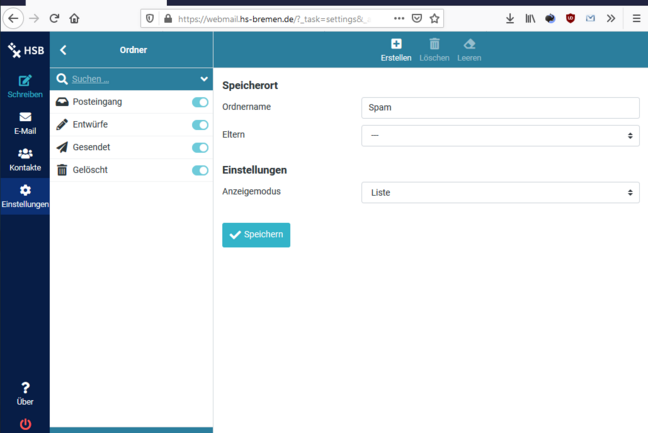
Log in to Webmail with your username and password. To keep the unwanted emails away from your inbox in the future it is necessary to create a new folder. To set up this folder, click on "Settings" in the menu bar on the left, then "Folders" and click on "Create" in the upper right corner. Give the new folder a name (e.g. SPAM) and click on "Save" (see the following figure).
Create a spam message filter
Step 2: Create spam message filter
Again on the left in the menu bar at the "Settings" click on "Filter" and again on the top right on "Create".
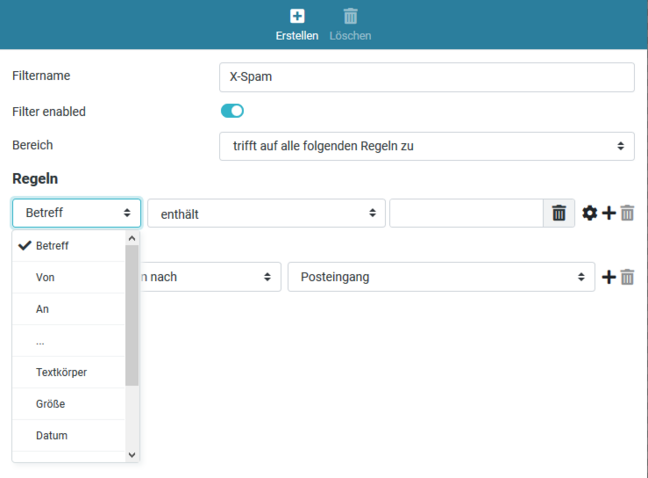
Assign a filter name, e.g. "X-Spam".
The filter should be "enabled" and the "Range" should be set to "applies to all following rules".
In the first field of the rules "Subject" is selected. Change it and select "..." (three dots).
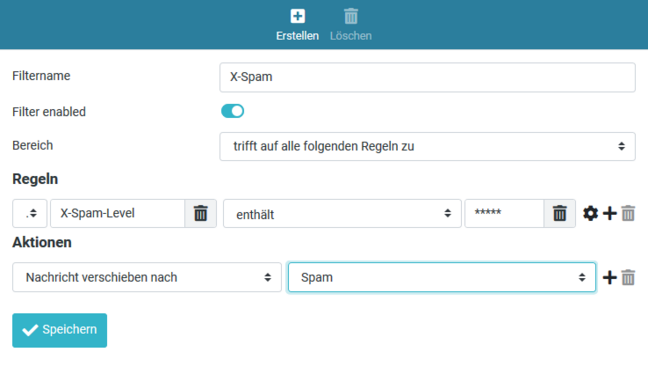
Step 3: In the field after the "..." type "X-Spam level". After "contains" write "*****" (five asterisks) in the field. At "Move message to" refer to your new "Spam" folder. After that click on "Save".
Now you have created a filter that will automatically move all emails to your newly created folder if those emails have received five or more stars from the central spam evaluator.
As you can see from the spam rating description table, emails with nine or more stars are very likely to be SPAM. Therefore, it is recommended to move these e-mails directly to the Trash folder with another message filter.
Create another message filter
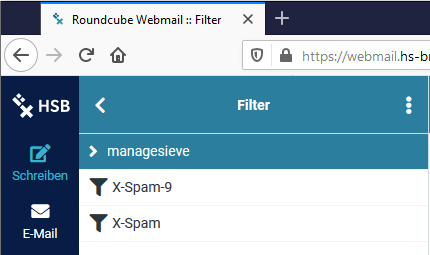
To create another filter rule, click again under the "Settings" on "Options" and select the option "Filter".
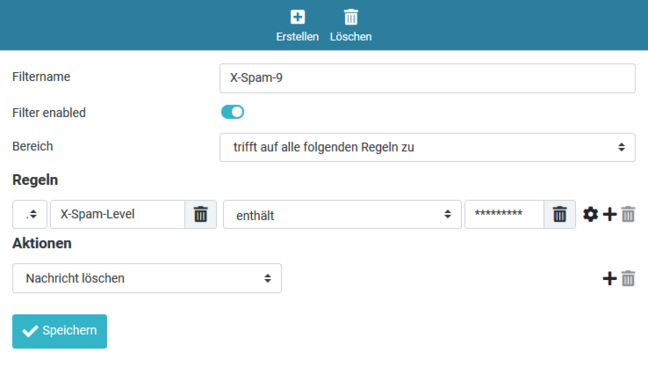
Again assign a filter name, e.g. "X-Spam-9". Again, the filter should be "enabled" and the "Range" should be set to "applies to all following rules".
In the rules, "Subject" is selected in the first field. Change it and select "X-Spam level", in the field after "contains" enter "*********" (nine asterisks) and in the "Actions" section refer to "Delete message".
After that click "Save" again.
Since message filters are processed sequentially, this second filter must be moved to the first position.
This can be done simply by drag and drop.
